The VMware HCX service – Exploring Integrated Services Configuration-2
14. After deploying and entering the credentials, the vSphere Client will have a new HCX plugin. The migration and site pairing configurations will be done from the plugin. To access it in the vSphere Client, click on Menu and select HCX, as shown in the following screenshot:
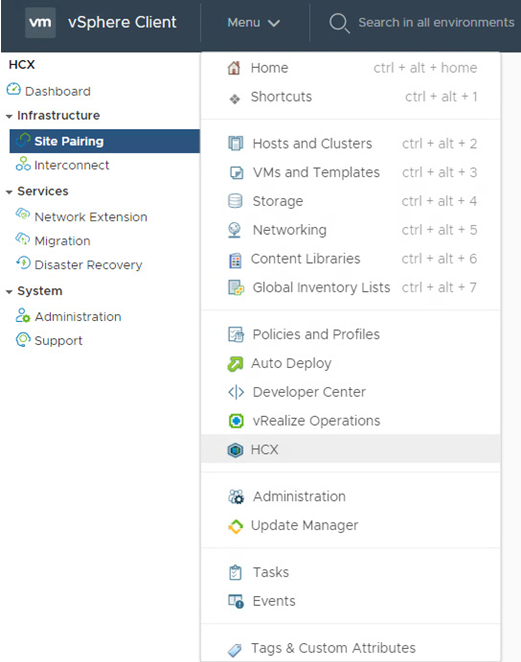
Figure 7.24 – The HCX plugin vSphere Client
15. In the HCX plugin, the first menu is the dashboard, which shows a summary of the current site pairing configuration, the number of migrated VMs, active migrations, and the number of network extensions, as shown in the following screenshot:
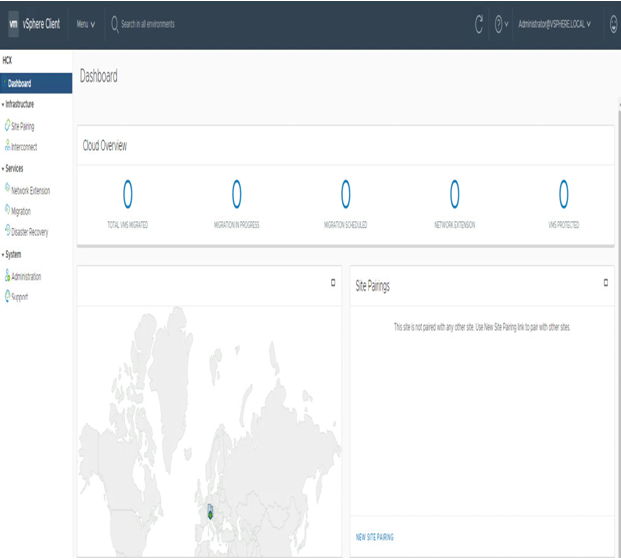
Figure 7.25 – The HCX plugin dashboard
16. To create connectivity between the on-premises HCX manager and the VMware Cloud on AWS side, navigate to Site Pairing and click ADD A SITE PAIRING. Users will need to add to the Remote HCX URL field the URL of the HCX Manager on the VMware Cloud on AWS side and enter the credentials of the cloudadmin user. Then, they need to click on CONNECT, as shown in the following screenshot:
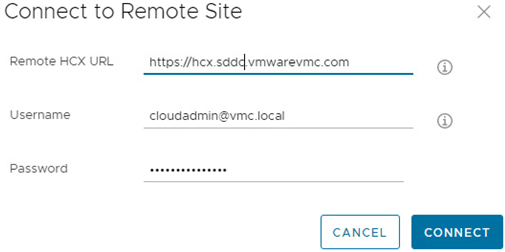
Figure 7.26 – HCX site pairing configuration
17. After creating the site pairing, if the firewall ports are open and the configuration is correct, the site pairing status will appear as green, indicating that it is connected, as shown in the following screenshot:
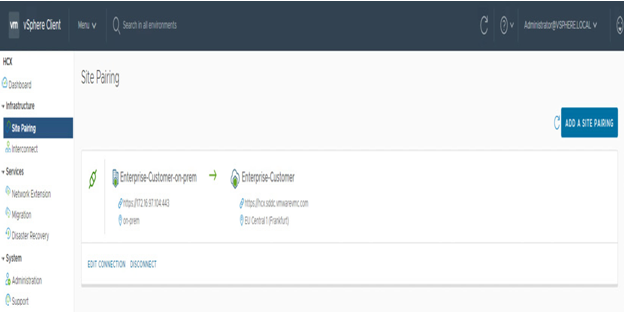
Figure 7.27 – HCX site pairing success
After creating a site pairing, the next step is to create a service mesh that will deploy the Interconnect (IX), WAN optimization (WO), and Network Extension (NE) appliances and configure them to enable the migration services. To do so, the user needs to configure the network and compute profiles that define which resources can be used on-premises and where those appliances will be deployed. The network profiles need to include, at a minimum, the management network profile, which needs to have access to vCenter/ESXi and the VMware Cloud HCX over the public internet or by a direct connection, and the vMotion network profile, which needs to be part of the vMotion network. Optionally, a vSphere replication network can be configured as well. However, mostly, it is part of the management network. The configuration examples can be seen in the following screenshot:
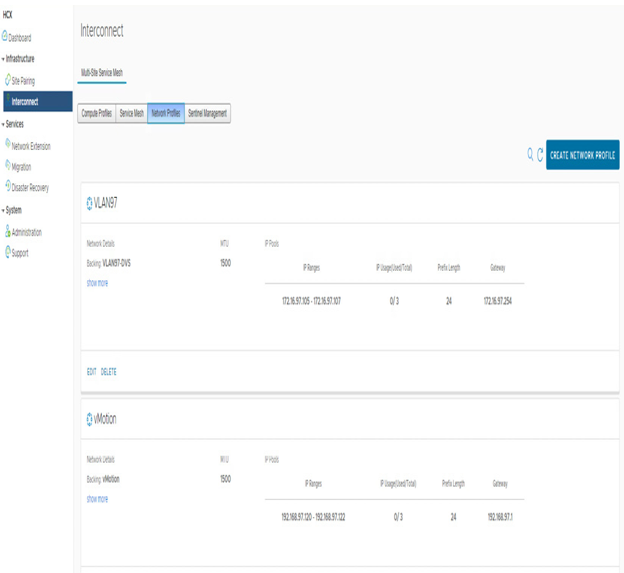
Figure 7.28 – An HCX network profile
18. In addition, the compute profile needs to define where to deploy the appliances and which services to enable. A summary of a configured compute profile is shown in the following screenshot:
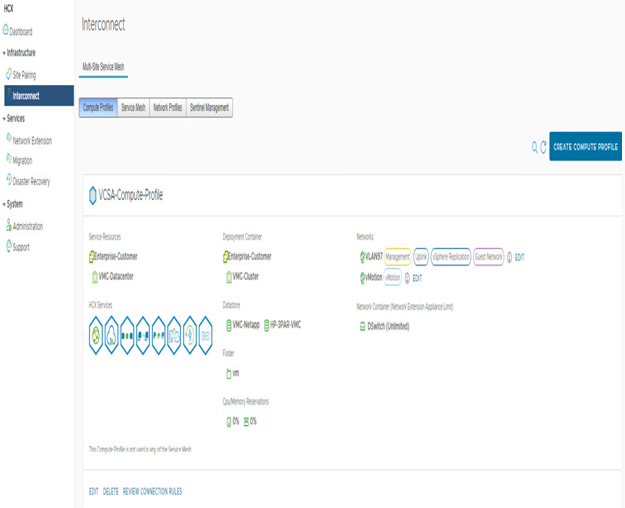
Figure 7.29 – An HCX compute profile
19. To create a new compute profile, select CREATE COMPUTE PROFILE, and a creation wizard will appear. On the first screen, provide the profile with a name and click on CONTINUE, as shown in the following screenshot:
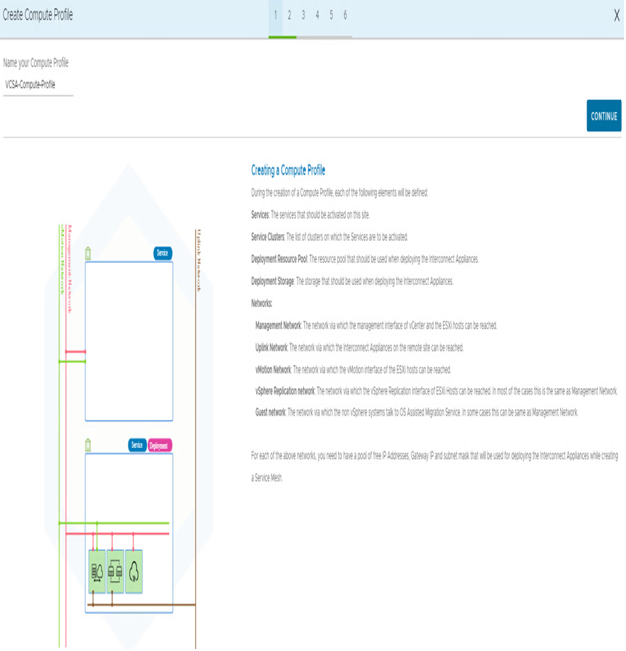
Figure 7.30 – The HCX compute profile creation
20. Next, the user needs to select which services to enable using this compute profile. All services can be enabled except SRM integration, which is not part of the VMware Cloud on AWS license at the time of writing. Toggle the services on and click on CONTINUE, as shown in the following screenshot:
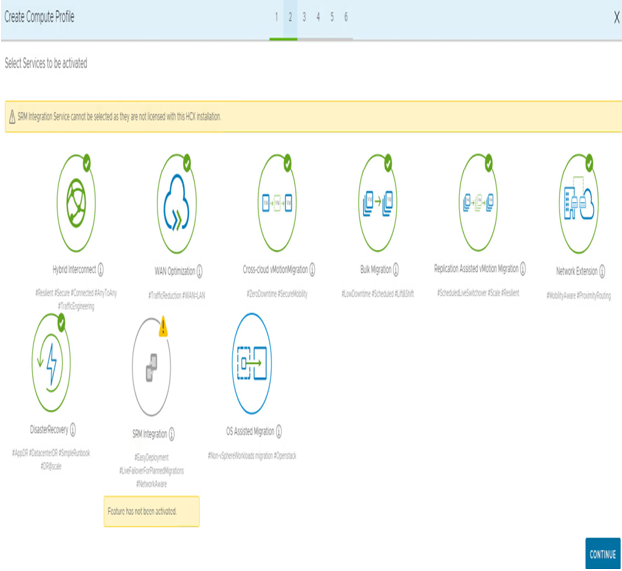
Figure 7.31 – Selecting an HCX compute profile service

