The VMware HCX service – Exploring Integrated Services Configuration-1
The VMware Hybrid Cloud Extension (HCX) service enables users to connect and migrate workloads from on-premises to VMware Cloud on AWS and back again, or from VMware Cloud on AWS to/from another VMware Cloud vSphere-based environment. HCX has a number of unique features that help to address the most sophisticated migration use cases, including the ability to schedule a migration, define a migration group, and stretch a Layer 2 network to the cloud.
Deploying and activating the HCX service
The steps to do this are as follows:
- To activate HCX, navigate to the SDDC console and then the Integrated Services tab, and select OPEN HCX, as shown in the following figure:
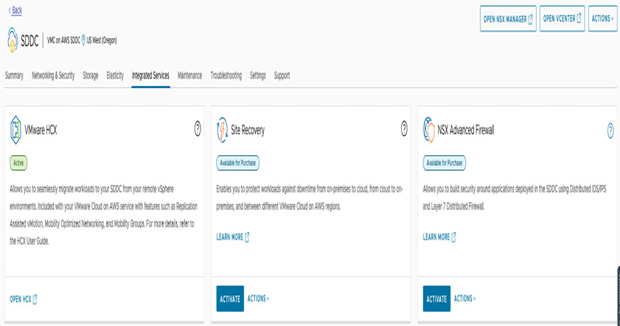
Figure 7.12 – The HCX add-on section
2. Next, a new tab will open where we can initiate the HCX deployment on the VMware Cloud side. To do so, click on DEPLOY HCX, as shown in the following screenshot:
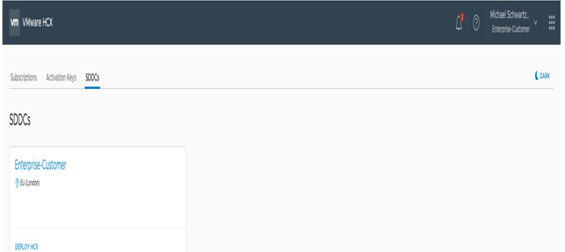
Figure 7.13 – Deploying the HCX add-on
3. After selecting a deployment, a confirmation message will appear. Select CONFIRM to move on, as shown in the following screenshot:
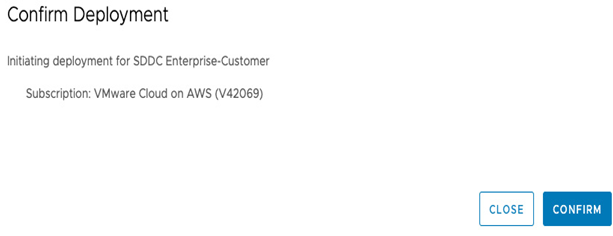
Figure 7.14 – Confirming the HCX activation
4. The deployment process takes about 30 minutes, during which HCX management appliances are provisioned and preconfigured on the SDDC automatically. When the process is complete, users can access the cloud HCX manager by selecting OPEN HCX, as shown in the following screenshot:
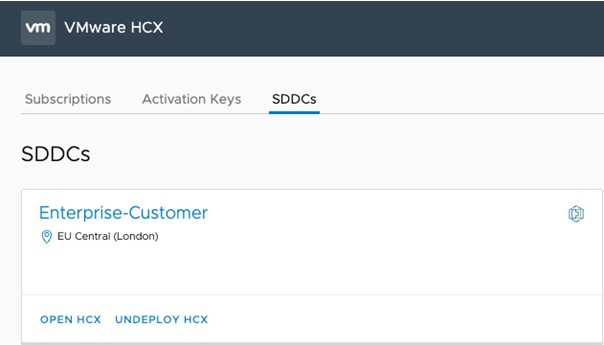
Figure 7.15 – OPEN HCX – post-deployment
5. Before being able to open the HCX manager, we’ll need to allow access to it in the Management Gateway firewall section by creating an allow rule with a source management IP address, either private or public, and with the destination set to the HCX service, as shown in the following screenshot:
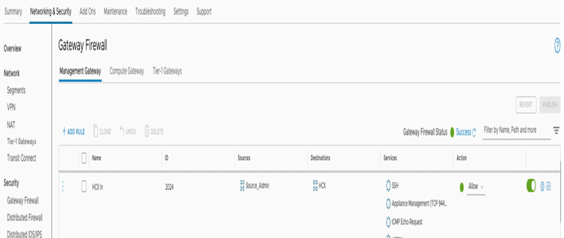
Figure 7.16 – HCX firewall rules on the Management Gateway Firewall
6. HCX management appliance access works like vCenter access; you can access the HCX UI either over the internet or by using a private IP over a VPN/DX. You can change the FQDN resolution to a private or public endpoint in the SDDC console under Settings | HCX Information | HCX FQDN, as shown in the following screenshot:
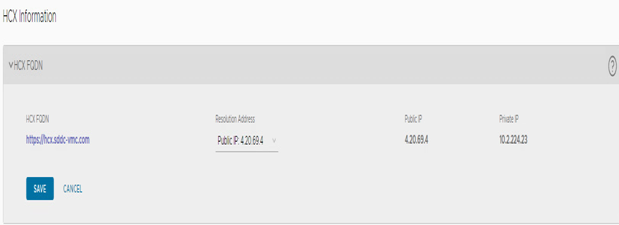
Figure 7.17 – The HCX DNS FQDN resolution
7. After configuring the DNS resolution and clicking on Open HCX, an authentication window will open. The HCX credentials are the same as the vCenter credentials and can be copied, as shown in the following screenshot:
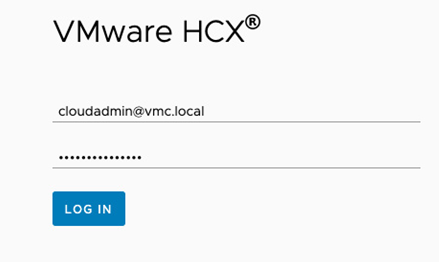
Figure 7.18 – Opening HCX management
8. The next step is to download the management appliance and deploy it in your pairing environment. In the case of a cloud-to-cloud HCX migration, there is no need to follow this step, as this task is automated on the cloud side. Navigate to System Updates, and click on REQUEST DOWNLOAD LINK, and the HCX appliance will start downloading, as shown in the following screenshot:
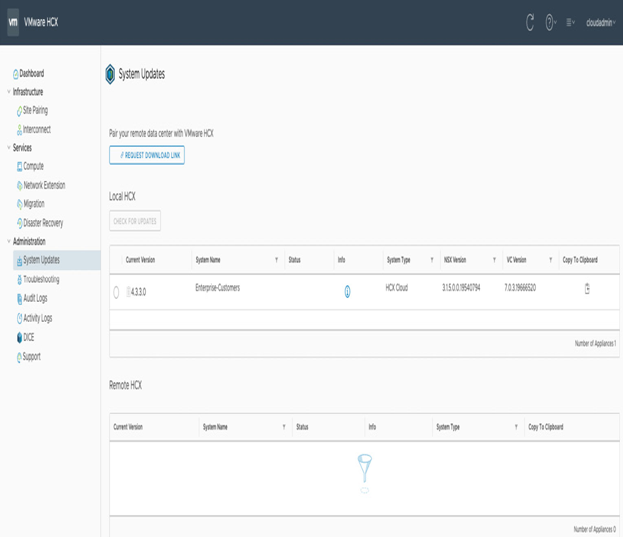
Figure 7.19 – Download the HCX Manager OVA appliance
9. After downloading the HCX Open Virtualization Appliance (OVA), deploy it on the on-premises vSphere environment on a vSphere port group that has network connectivity with the local on-premises vCenter Server using a port group that can communicate with the local vCenter and over the WAN.
Information
Further details on how to configure the on-premises side of the HCX appliance can be found at https://vmc-onboarding.com/guide/4.-deploy-add-ons/hcx-hybrid-cloud-connect/.
10. Once deployed, users will need to provide an activation key for the on-premises appliance. It can be generated under Activation Keys by clicking on CREATE ACTIVATION KEY, as shown in the following screenshot:
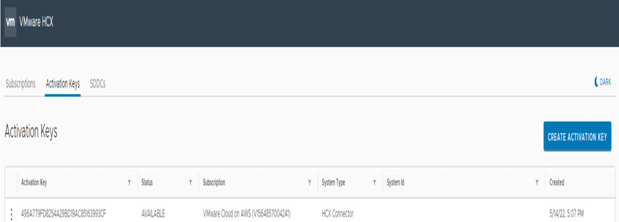
Figure 7.20 – HCX management license activation
11. The license key confirmation needs to be validated by selecting the system type as HCX Connector and clicking on CONFIRM, as shown in the following screenshot:
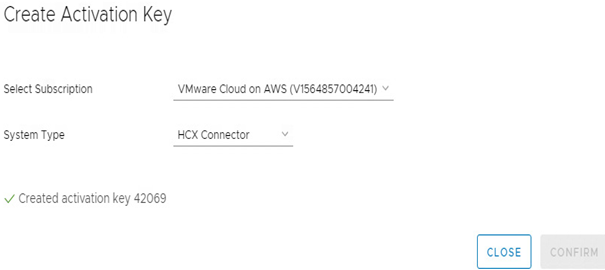
Figure 7.21 – HCX management license activation confirmation
12. In the on-premises HCX Manager appliance, log in to the appliance over port 9443, using the admin credentials entered during the OVA deployment process. In the management UI, users can enter the license key generated on the cloud side, as shown in the following screenshot:
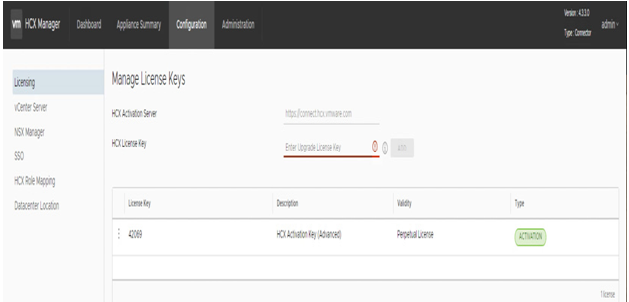
Figure 7.22 – HCX management gateway license activation
13. Additionally, the local vCenter URL and credentials need to be entered under the vCenter Server section under the Configuration tab to pair with vCenter Server, as shown in the following screenshot:
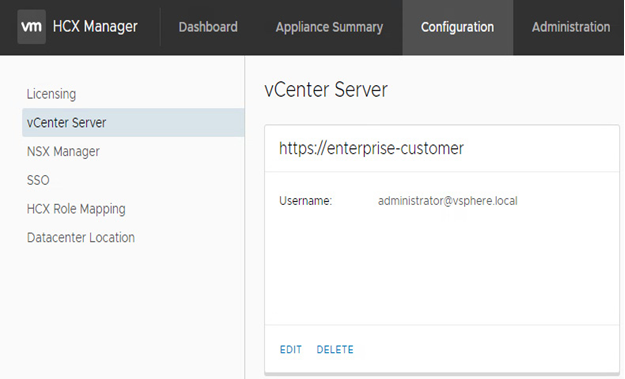
Figure 7.23 – HCX management vCenter configuration

