

INFORMATION – Understanding Networking and Security Configurations
To view and edit the networking configuration for your SDDC, the NSX Cloud Admin or NSX Cloud Auditor CSP role is required.
For enhanced security, we recommend changing the NSX Manager URL resolution to a private IP address and using a VPN or DX to access it. If you choose to do so, you will need to explicitly authenticate within the NSX Manager.
The local cloud_admin credentials, the password to the NSX manager, and the URL can be found in the SDDC console under Settings | NSX Manager URLs | URL to access via an internal network (log in through NSX Manager credentials), as seen in the following screenshot:
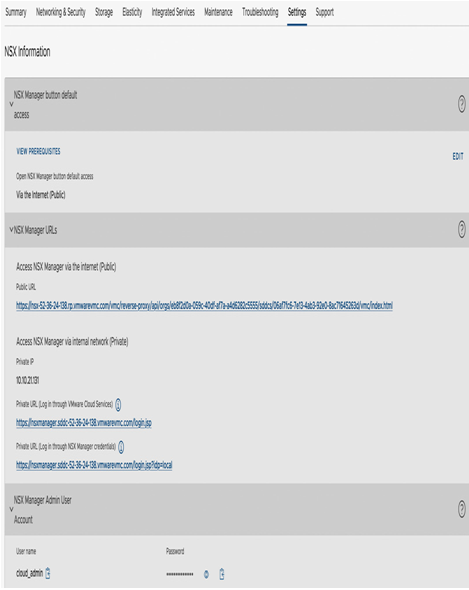
Figure 6.3 – Access NSX Manager through a private IP
When using the NSX Manager cloud_admin credentials for authentication, customers can add an external LDAP as an authentication source for the NSX Manager.
Network segments
Customers are responsible for provisioning NSX network segments and deploying workloads.
Segments are equivalent to AWS subnets and VMware virtual switch port groups; virtual machines have their virtual network interface card (vNIC) connected to network segments provisioned in the NSX Manager.
Users can create routed, extended, or disconnected networks and associate them with a Tier-1 Gateway:
- Routed segments are automatically connected to the Tier-1 Gateway and, as the name implies, externally routed
- Disconnected segments do not have an uplink to the tier-1 gateway and are not routed
- Extended (Layer 2) segments used by NSX L2 VPNs are not routed
To create a new segment, navigate from Networking to the Segments section, as seen in the following screenshot:

Figure 6.4 – Create a new segment
On the Segments pane, in the NSX tab, click on ADD SEGMENT and provide a segment name (the name will be reflected as an available segment in the vSphere Web Client), under the Connected Gateway field, select Segments as Routed, and in the Subnets field, specify the default gateway IP address of the CIDR to be used for the segment (e.g., 10.22.12.2/23 as shown in the following screenshot):
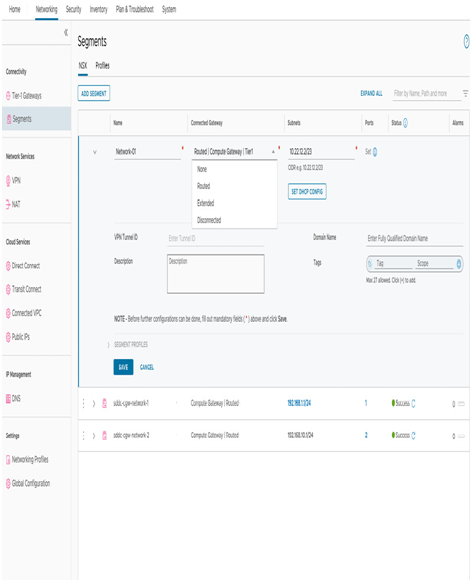
Figure 6.5 – Create a new routed segment
Click on SAVE, and when asked to continue configuring the segment parameters, such as the DHCP options, choose NO (we’ll review DHCP configurations later in this chapter):
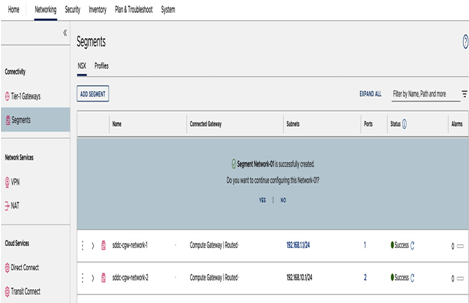
Figure 6.6 – Continue configuring a segment
Next, we’ll create a disconnected segment. In the Connected Gateway section, select Disconnected. This configuration means the segment will be disconnected from the tier-1 gateway, and it can be useful for isolated testing purposes and security appliances, or for customer-managed appliance use cases. The rest of the steps are the same as creating a routed segment, as seen in the following screenshot:
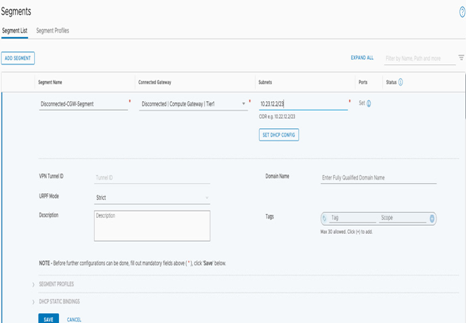
Figure 6.7 – Create a disconnected segment
The third segment type is an extended segment. Click ADD SEGMENT and select Extended. Unlike a Routed Segment where the default gateway resides on a Tier-1 logical router on the SDDC, the default gateway for Extended Segments remains on-premises. This is why the subnet field is disabled or grayed out. The Layer 2 VPN tunnel ID used to extend the segment from on-premises needs to be specified in the VPN Tunnel ID field (as shown in Figure 6.8).

Figure 6.8 – Create an extended segment
If a Layer 2 VPN tunnel has not been established, it will not be possible to save the segment configuration, and a message prompting to create one will appear as in the following screenshot:
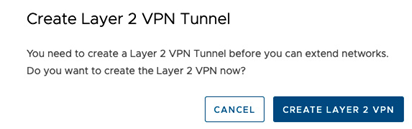
Figure 6.9 – Create Layer 2 VPN Tunnel message
Note
This process of creating an extended segment applies to a configuration where the Layer 2 VPN is established using NSX Edge. If you use HCX to extend the network, you do not need to create an extended segment – segments will be created by HCX automatically.
Multiple Tier-1 Gateways
Customers can create multiple tier-1 gateways in addition to the default CGW, thus creating a topology that can support workload isolation and multitenant topologies, as seen in the following diagram:
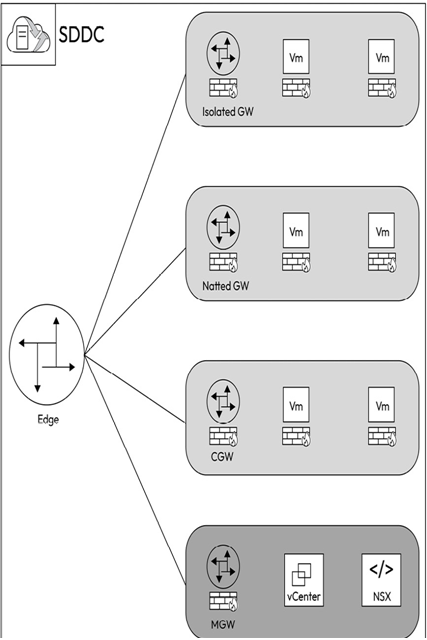
Figure 6.10 – Multiple Tier-1 Gateways
Additional gateways beyond the CGW have the following configuration options:
- Routed Compute Gateways are connected to the SDDC’s NSX overlay networks. Segments running behind routed CGWs can communicate with workloads running behind other CGWs, including the default CGW. Additionally, these VMs can access the internet through Elastic IP (EIP).
- NATted Compute Gateways require NAT configurations to establish connectivity with the SDDC’s NSX overlay networks. Network segments behind a NATted CGW are not advertised, allowing the creation of segments with overlapping CIDR blocks within the SDDC. This allows for organizations to create multi-tenant environments, or complex designs with overlapping IP addresses. Segments behind NATted CGWs can communicate with external networks using route aggregation.
- Isolated Compute Gateways are disconnected from the SDDC’s NSX overlay. Network segments behind an isolated CGW are neither advertised not NATted. However, network segments behind an isolated CGW can communicate with each other, but would not be able to connect with segments behind other CGWs or external networks. Isolated CGWs can be used for advanced use cases such as Disaster Recovery (DR) testing using isolated networks.